Basics Of HTML5 GetUserMedia API
In this tutorial I will explain how to capture video and audio using getUserMedia in HTML5 with an example.Then I will explain how to take snapshot using HTML5 getUserMedia API.
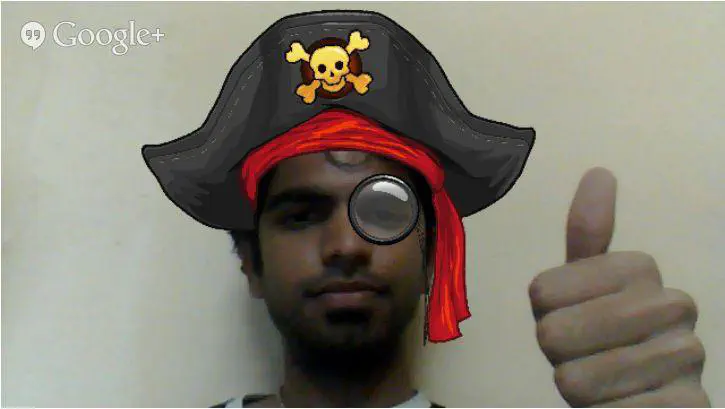
And Finally You will learn how to implement Google Hangout Effects using html5 getUserMedia API
First take a look at browser support for javascript getUserMedia API.
HTML5 getUserMedia browser support:
Currently chrome,mozilla,opera supports getUsermedia API.
For chrome and Mozilla we have to prefix corresponding web engine i.e., for chrome we have to use “webkitGetUserMedia” function and for mozilla “mozGetUserMedia” function.
For Opera no need to add any prefix simply use “getUserMedia”.
By default getUserMedia disabled in chrome and mozilla.
Enable getUserMedia in browsers:
To enable getUserMedia in Chrome type ‘chrome://flags/’ in URL bar and enable “Enable screen capture support in getUserMedia(). Mac, Windows, Linux, Chrome OS” option.
To enable getUserMedia in Mozilla type ‘about:config’ in URL bar search for “media.navigator.enabled” and set it True.
Safari and InternetExplorer does not support getUserMedia.
For more information check getUserMedia Browser Support
getUserMedia Example:
One important thing you should remember is
You cannot use getUserMedia on web pages served using file:// URLs.
So host your HTML file in Apache or IIS , then browse better use Visual Studio.
Here is the sample HTML file
<!DOCTYPE html>
<html lang="en">
<head>
  <meta charset="utf-8">
  <title>HTML5 getUserMedia Demo By Arunkumar Gudelli</title>
</head>
<body>
  <div id="video">
    <video id="webcam" width="500" autoplay></video>
  </div>
</body>
</html>
And next we will write javascript code. Instead of if else loops to support different browser we will define navigator.getUserMedia as shown below.
jQuery(document).ready(function () {
           navigator.getUserMedia = (navigator.getUserMedia ||
                            navigator.webkitGetUserMedia ||
                            navigator.mozGetUserMedia ||
                            navigator.msGetUserMedia);
});
Now we will understand HTML5 getUserMedia function it will take three arguments like constraints,successCallback,FailureCallback. The syntax is shown below.
navigator.getUserMedia ( constraints, successCallback, errorCallback );
constraints:
getUserMedia constraints are nothing but which media streams to use i.e., audio or video.And it is required field
{ video: true, audio: true }successCallback:
successcallback is the function we call when media stream is loaded successfully in our case put it into video tag.success callback is required field.
The getUserMedia function will call the function specified in the successCallback with the LocalMediaStream object that contains the media stream.
function(localMediaStream) {
   var video = document.querySelector('video');
   video.src = window.URL.createObjectURL(localMediaStream);
}- First we are getting video element using document.querySelector()
- And Then creating a object URL for the localMediaStream provided by the getUserMedia using window.URL.createObjectURL
- Finally use this URL for the source of Video element.
errorCallback:
Failure callback is the function we call when media stream cannot be loaded.The function called with different types of code arguments as mentioned below.And it is optional however in mozilla it’s required field.
| Error | Description |
|---|---|
| PERMISSION_DENIED | The user denied permission to use a media device required for the operation. |
| NOT_SUPPORTED_ERROR | A constraint specified is not supported by the browser. |
| MANDATORY_UNSATISFIED_ERROR | No media tracks of the type specified in the constraints are found. |
Sample errorCallback function
function onFailure(err) {
            alert("The following error occurred:"+err.name);
        }
err.name will display the corresponding error codes
And here is the Final Code. Load your document (remember host it on apache or IIS) and grant permission.
<!DOCTYPE html>
<html lang="en">
<head>
  <meta charset="utf-8">
  <title>HTML5 getUserMedia Demo By Arunkumar Gudelli</title>
  <script src="https://code.jquery.com/jquery-1.10.2.min.js" type="text/javascript"></script>
  <script>
      function onFailure(err) {
          alert("The following error occured: " + err.name);
      }
      jQuery(document).ready(function () {
          var video = document.querySelector('#webcam');
          navigator.getUserMedia = (navigator.getUserMedia ||
                            navigator.webkitGetUserMedia ||
                            navigator.mozGetUserMedia ||
                            navigator.msGetUserMedia);
          if (navigator.getUserMedia) {
              navigator.getUserMedia
                            (
                              { video: true },
                              function (localMediaStream) {
                                  video.src = window.URL.createObjectURL(localMediaStream);

                              }, onFailure);
          }
          else {
              alert('OOPS No browser Support');
          }
      });
  </script>
</head>
<body>
  <div>
    <video id="webcam" width="500" autoplay></video>
  </div>
</body>
</html>
And Next step we will take snapshot and display it into HTML5 Canvas element.
Add Canvas tag and Capture Button to our HTML Code.
<canvas id="screenshot-canvas"></canvas>
<button id="screenshot-button">Capture</button>
And then add javaScript code
var button = document.querySelector('#screenshot-button');
var canvas = document.querySelector('#screenshot-canvas');
var ctx = canvas.getContext('2d');

button.addEventListener('click',snapshot, false);

function snapshot() {
canvas.width = video.videoWidth;
canvas.height = video.videoHeight;
ctx.drawImage(video, 0, 0);
}
I added snapshot() method
- Canvas width and height we are assigning to video element width and height
- And then We are drawing Image on canvas using drawImage() function which takes argument video element and X,Y Coordinate position.
- And Finally we added this method to capture button click event.

HTML5 getUserMedia Demo
Here is the Final Demo.
Actually I tried to implement Google Hangout effects using HTML5 Canvas and getUserMedia, so in this post I tried to cover all basics of HTML5 getUserMedia.
Go through this awesome article Learn how to implement Google Hangout effects

Google Effects
I hope you’ve enjoyed this article and that it gives you more ideas on HTML5 getUserMedia API .
If so share this post with your friends and also join our mailing list I will be sharing my learnings and experiments with HTML5
NOTE: getUserMedia has been removed from the Web standards.